How to set the expiration date password expiration date in Windows 10?
If you are a Windows 10 owner, then you have the opportunity to increase the security of your PC by changing the password by expiration date.
Set your Microsoft account password to expire:
one. Go to the Microsoft account security area.
2. Sign in.
3. In the section “Change password” click “Change” .
four. Enter a new secure password.
5. Check “Force me to change my password every 72 days”.
6. Click “Save” to apply the new password and expiration date.
7. Sign in and out of Windows to use the new password.
Set the password age for local account:
1. Press “Win + R” on your keyboard to open the run window “Run”.
2. Enter “netplwiz” and press “OK”.
3. Under “Advanced” click “Advanced”.
four. In the menu on the left, click “Users”.
5. Right click on your user account.
6. Click “Properties”.
7. Uncheck “Password never expires” and click “OK”.
Setting the password age using the local editor group policy:
1. Press “Win + R” on your keyboard to open the run window “Run”.
2. Type “gpedit.msc” and click “OK ”.
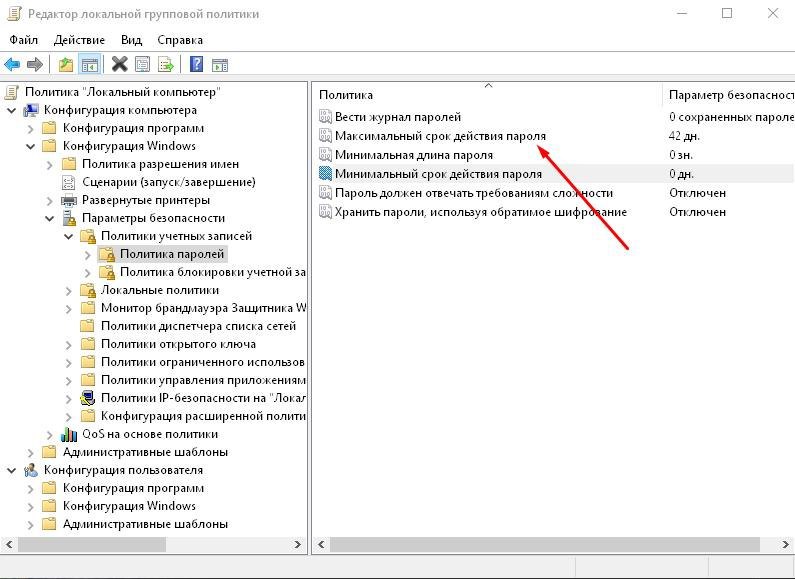
3. In the menu on the left, go to “Computer Configuration> Windows Settings> Security Settings> Account Policies> Password Policy” .
four. Double-click on “Maximum password age”.
5. Change the value to the desired number of days and press “OK”.
Set password age using Windows PowerShell:
one. Right-click on the menu “Start”.
2. Select “Windows PowerShell (Administrator)” or ” Command Prompt (Administrator)”.
3. In the PowerShell window, type “net accounts”.
4. Enter “net accounts /maxpwage:00”.
5. Replace “00” with the password expiration date (in days).
Note: The steps performed using the “Local Group Policy Editor” only work if your computer is running Windows 10 Pro, Education or Enterprise.